The Ultimate Guide to DIY Soap Making for Beginners

Have you ever picked up a bar of artisanal soap and wondered, “Could I make this myself?” Well, you’re in luck! DIY soap making for beginners is not only possible but also an incredibly rewarding hobby.
In this comprehensive guide, we’ll walk you through the basics of crafting your own natural cleansers, from gathering soap making supplies to mastering the cold process soap technique.
Why Make Your Own Soap?
Before we dive into the nitty-gritty of soap making, let’s talk about why you might want to give it a try:
- Control over ingredients: You decide what goes into your soap, avoiding harsh chemicals.
- Customization: Create soaps tailored to your skin type and fragrance preferences.
- Eco-friendly: Reduce packaging waste and use sustainable ingredients.
- Cost-effective: Save money in the long run by making your own high-quality soaps.
- Creative outlet: Express yourself through unique designs and formulations.
Table of Contents
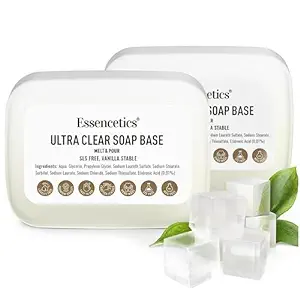
Essential DIY Soap Making Supplies
To get started with DIY soap making, you’ll need to gather some basic soap making supplies:

- Oils and fats (e.g., olive oil, coconut oil, shea butter)
- Lye (sodium hydroxide)
- Distilled water
- Fragrance or essential oils
- Colorants (optional)
- Thermometer
- Immersion blender
- Safety gear (goggles, gloves)
- Molds
- Scale for precise measurements
Pro Tip: Always use a dedicated set of tools for soap making to avoid contamination.
Understanding the Cold Process Soap Method
The cold process is one of the most popular methods for making homemade soap. Here’s a basic overview:
- Preparation: Measure your ingredients and don safety gear.
- Lye solution: Carefully mix lye with water (always add lye to water, never the reverse).
- Oil preparation: Melt and mix your chosen oils.
- Combining: Once both mixtures cool to about 100-110°F, slowly add the lye solution to the oils.
- Tracing: Blend until the mixture reaches “trace” (a pudding-like consistency).
- Additives: Incorporate fragrances, colors, or other additives.
- Molding: Pour the soap into molds and insulate.
- Curing: Allow the soap to cure for 4-6 weeks before use.
Natural Soap Ingredients to Explore
One of the joys of DIY soap making is experimenting with different natural ingredients. Here are some popular options:
- Olive oil: Creates a mild, moisturizing bar
- Coconut oil: Provides hardness and lather
- Shea butter: Adds luxury and skin-nourishing properties
- Essential oils: For natural fragrance and potential aromatherapy benefits
- Herbs and botanicals: For visual appeal and gentle exfoliation
- Clays: To add color and detoxifying properties
Beginner-Friendly Homemade Soap Recipes
Ready to try your hand at soap making? Here’s a simple recipe to get you started:
Ingredients:
- 16 oz olive oil
- 14 oz coconut oil
- 2 oz castor oil
- 4.5 oz lye
- 10.8 oz distilled water
- 1 oz essential oil (optional)
Follow the cold process method outlined above, and you’ll have your first batch of homemade soap!
Troubleshooting Common Soap Making Issues
Even experienced soap makers encounter problems sometimes. Here are a few common issues and how to address them:
- Soap doesn’t harden: Usually due to too much water or not enough lye. Double-check your measurements.
- Separation in the mold: Often caused by temperature issues. Try to keep your soaping environment consistent.
- Cracking: Can be due to overheating. Try reducing insulation during the initial curing phase.
Taking Your Soap Making to the Next Level
Once you’ve mastered the basics, consider exploring these advanced techniques:
- Hot process soap making
- Milk-based soaps
- Layered and swirled designs
- Soap cupcakes and other molded shapes
- Developing your own unique recipes
The Joy of Sharing Your Creations
One of the most rewarding aspects of DIY soap making is sharing your creations with others. Consider starting a soap-swapping group with fellow crafters or gifting your soaps to friends and family. You might even explore selling your soaps at local craft fairs or online marketplaces (just be sure to research regulations in your area first).
Safety First
Remember, while soap making is fun, it involves working with lye, which can be dangerous. Always prioritize safety by wearing protective gear and working in a well-ventilated area.
Conclusion
In conclusion, DIY soap making for beginners is an exciting journey into the world of natural skincare. With a bit of patience and practice, you’ll be crafting beautiful, skin-nourishing soaps in no time. So gather your supplies, roll up your sleeves, and let your creativity flow.
We’d love to hear about your soap-making adventures! Have you tried making your own soap? What challenges did you face? Share your experiences in the comments below, and don’t forget to upload photos of your creations!